Rack, Stack, and Puff: Building a Dedicated Vaping Station That Would Make r/homelab Weep
Photo: Shixart1985, CC BY 2.0, via Wikimedia Commons
There's a particular kind of person who owns a label maker, and there's a particular kind of person who owns a label maker and vapes. If you're the second kind, this article is your permission slip.
The homelab community has spent the last decade convincing nerds that a hobby isn't real until it has dedicated infrastructure — a rack, a UPS, cable runs with proper slack management, and a spreadsheet somewhere tracking it all. Vaping deserves the same treatment. You've got consumables, batteries, precision hardware, and inventory that expires. That's not a junk drawer. That's a data center with clouds you can actually see.
Why Bother? (Besides the Obvious Satisfaction)
A dedicated station solves real problems. Juice bottles migrate. Batteries get mixed up. Coils vanish into the same dimensional rift as your spare microSD cards. A structured setup means you always know what you have, what's aging out, and what needs replacing — the same logic behind monitoring your NAS drives before they fail.
Plus, and let's be honest here, it looks incredible. A tidy vape station on a desk next to a mechanical keyboard and a Framework laptop is a personality statement.
Zone 1: The Juice Inventory Bay
E-liquid is perishable, light-sensitive, and — if you've got more than ten bottles — genuinely hard to track. Borrow from your pantry and your Plex server at the same time.
- Storage: A small acrylic drawer unit or a repurposed parts organizer works great. Keep bottles upright, away from direct sunlight, ideally somewhere room-temperature. Basements in Minnesota and attics in Texas are both wrong answers.
- Labeling: Masking tape and a fine Sharpie is the budget play. The prestige play is a Brother P-touch with the date you opened each bottle. Add the nicotine strength and flavor profile if you're running multiples.
- Inventory tracking: A simple spreadsheet with columns for flavor, nic level, purchase date, and "opened" date is all you need. If you want to go full homelab, someone has absolutely built a self-hosted juice tracker, and you will find it in an afternoon of googling.
Steep times matter too. Mark the date a fresh bottle needs to sit, the way you'd mark a firmware update window.
Zone 2: The Battery Testing Bay
This is the zone where we get serious, because batteries are the one part of this hobby where sloppy infrastructure has actual consequences.
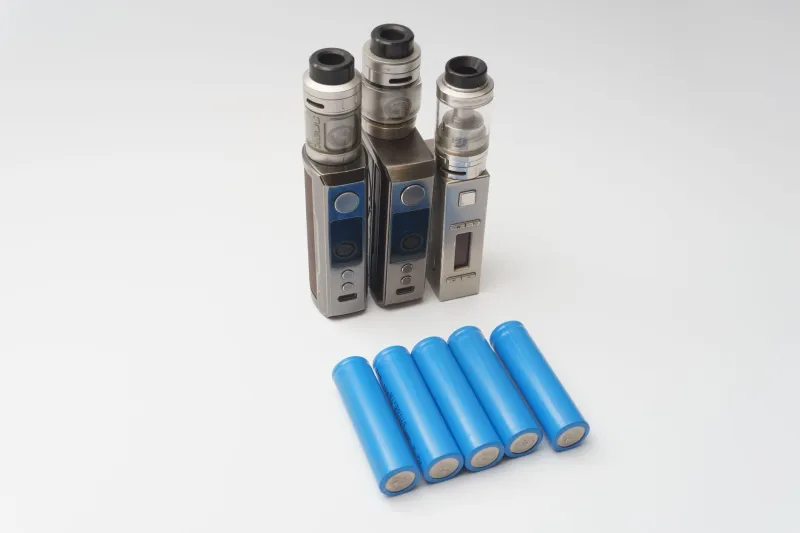
- Charging: Never charge 18650s or 21700s on cheap no-name chargers. Get a quality external charger from a reputable brand, and give it a dedicated spot on the station — not a wall outlet behind the couch.
- Storage: Loose batteries in a pocket with keys is how people end up on local news. Magnetic or silicone battery cases, stored in a designated drawer, always.
- Retirement protocol: Mark the purchase date on your cells with that label maker. Batteries have a service life; rotating them out on a schedule — like you'd rotate drives in RAID — keeps your daily drivers healthy. A small fireproof bag for retired cells costs about as much as a coffee.
Zone 3: Coil and Parts Organization
Every vaper has a graveyard of half-used coils, o-rings, screws, and mystery Allen keys. Time for the parts bin.
A small parts organizer with adjustable dividers — the kind used for PC screws and SMD components — is perfect. One compartment for fresh coils, one for used coils awaiting recycling, one for o-rings sorted by size, one for tools. If you rebuild, a silicone mat with magnetic screw sections turns your station into an actual workbench instead of a carpet-dependent gamble.
Zone 4: Cable Management (The Homelab Rite of Passage)
You didn't think we'd skip this, did you?
Charging cables, USB-C dongles, charger power bricks — they multiply. Velcro ties (never zip ties on cables you move), a short cable tray under the desk shelf, and consistent cable routing will make your station look like a rack install instead of a nest. Color-code if it helps: one color for mod charging, one for the external charger, one for accessories.
The finishing touch is a modest desk mat or tray that defines the station's footprint. Visual boundaries make a space feel intentional.
The Maintenance Schedule
Homelab people love a cron job, so here's yours:
- Weekly: Wipe down the station, check juice levels, toss dead coils.
- Monthly: Inspect batteries for wrap damage, rotate stock, update the spreadsheet.
- Quarterly: Deep clean tanks and pods, audit the inventory, retire anything past its prime.
Start Small, Iterate Often
Nobody builds the full rack on day one — not in servers, not in vaping. Start with battery safety and juice labeling, then let the station grow with the hobby. Within a month you'll wonder how you ever lived in the junk drawer era.
And when a friend comes over and asks why your vape bottles are labeled and sorted by nicotine strength? Tell them uptime matters. They'll either get it or they won't.